I work in a hospital. I answer the phones when people have issues with our computerized charting system. I have weathered some pretty awful people doing this job: the haters, the I-can'ts, the this-is-so-stupids, the you-don't-know-what-you're-talking-abouts.... you get the picture.
I realize now, that the past 18 months were just to prepare me for today.
Today was the day that I walked my computer illiterate parents through the process of printing out their cruise documents, boarding passes, and luggage tags. Over the phone.
No big deal, you're thinking? Well, maybe not if you know what the phrases: 'browser window,' 'search engine,' 'log in box,' 'password,' 'x-to-close' and 'printer icon' mean. Picture in your head having to be dually logged in and attempting to give verbal directions to two people who have a brand new computer and do not know how to get on the Internet.
Yes, let's get ONLINE first. Oh, you say you don't know how to get online? Okay. Deep breath. Let's start at the beginning. Oh. My. God.
The saving grace after 90 minutes of deep breathing, gut wrenching, face making, gun in my mouth pantomiming, was the sound of the printer working in the background and this final statement: "Oh, you're such and expert! How would we have done this without you! Thank you!"
It's only noon, but believe me, I need a cocktail.
Friday, December 9, 2011
Thursday, December 1, 2011
The Dirty Bathroom Dream
I am plagued, I tell you! Plagued with recurrent dreams for over a month now. I mean every single night.
I am in some unfamiliar place, searching for a restroom. Never somewhere I know, which is pretty funny considering how much I complain about the bathrooms at work. This place is always public, always full of stalls, usually over twenty or thirty of them. And they are all filthy! Every single one of them. I will spare you the details, but suffice it to say that I wouldn't use any of them if they were the last bathrooms on earth.
The most bizarre thing about these dreams is that there are other people around, and none of them seem to be bothered by the lack of toilet seats, stall doors or by the filthy floors overflowing with sewage. In fact they are all happily using this disgusting bathroom as if they had no cares in the world.
Being the metaphysical person that I am, of course I researched this, because my life has been in a hideous upheaval the past month and I believe that there is some connection. Here's what I found:
Information from "The Strangest Dream...The Dreamers Dictionary for the 21st Century" by Kelly Sullivan Walden, describes that dreams of bathrooms symbolize releasing and letting go of toxic feelings and thoughts. In addition dreams of human excrement signify a releasing and letting go of what is in the way of your being fully in your power. Ms Walden also writes that dreams of dirt indicate that there is an aspect of your life that needs to be cleaned up and dreams of urine signify that a person is releasing negativity. A common theme here with all of these symbols is a letting go to start anew.
In George Fink's, "Dream Symbols A-Z", Mr. Fink writes that bathrooms are a place for cleaning up, and indicate emotional purification. Dreams which contain a toilet mean that we want to rid ourselves of burdens. He goes on to write that a dream about feces may be related to "financial matters or to evaluating the worth of someone's character." He writes that "it points to the dreamer's sense of order and generosity."
In "Parkers' Complete book of Dreams" by Julia and Derek Parker I read a particularly powerful statement which may be helpful, "Refuse is something that we want to dispose of . It may be something we no longer want or something foisted upon us by others.
Well, considering all that, I guess I need to stop being so negative, release my toxic feelings towards middle management, and think twice about staying in my current position at the hospital, since that seems to be where all this angst is coming from. Food for thought.
Sunday, November 20, 2011
What's that you say is in my food??
It's been a busy month, as evidenced by the fact that I've left this boring chronicle of stock-making up here for ages! But I just finished my term paper, which is on Morgellons disease. If you don't know what that is, you're not alone. Even the CDC doesn't know what it is, although they've supposedly been researching it for three years.
The disease process was brought to my attention by my vegetarian son, Renn, who is extremely into the non-GMO movement and who is more picky about what he eats and wears than anyone I know. Renn has long been into the travesty of Monsanto Corp, and what they've done to the American Food supply with their genetically modified organisms, and monopoly of the seed supply. If you haven't researched that, I'll give it to you in a nutshell: Monsanto is responsible for the bumper crops of corn and soybeans that we now grow in the US, mostly to feed our beef lot super meat growing sites, and our chicken productions.
To obtain a "superior" seed, Monsanto corporation has genetically modified the seed supply, by adding agrobacterium, a gram negative bacteria which they inject into the roots of plants. The result is a spore that causes massive overgrowth in the root, and a resulting bumper crop of produce. What's wrong with that, you ask? Well, for starters, there are no long-term studies that look at how consuming produce that is genetically modified affects our body, or at how eating meat that has been fed GMO's affects our body.
We've been eating this stuff for nigh on 30 years now, and about 12 years ago, some people started showing up in the emergency departments around the country, complaining about crawly, itchy skin, lesions sprouting strange fibers, chronic fatigue, neurological problems, and black flakes in their urine. No one knew what was going on with them, and although their numbers increased, the general consensus of the medical community was that they were suffering from a psychiatric disorder known as Psychotic Parasitosis. In other words: you think you have bugs and fibers moving around under your skin. Take an anti-psychotic, and deal with it.
Thanks to one woman, whose 2 year old baby kept sprouting "fuzz balls" out of his face, the Morgellons Research Foundation was begun in 2002, and in 2008, the CDC agreed to sponsor a study into the disease process of people suffering from Morgellons. Problem is, the research was completed in 2009, and as of yet, not a word has been said regarding the findings. NO ONE is studying this problem, even though a SUNY study in 2007 and another study in 2009 both showed that all fibers tested from various patients tested positive for agrobacterium DNA. The 2009 study showed conclusively that agrobacterium in the specific patient studied was coming out of his WATER SUPPLY. But no one has looked into where the water came from, or it's proximity to fields growing GMO produce. No one has studied why people are sprouting foreign substances out of their bodies that have agrobacterium DNA. What is that doing in humans?
My theory? That in immunosuppressed people, the body cannot deal with what is essentially a foreign substance, and therefore the body attempts to rid itself through unconventional means. IE: pushing fibers out through the skin, or through the urine.


My goal here, in exposing you all to this medial jargon and talky-talk, is to get you to think about the value of buying local. Know your farmer, read the labels, do some research. This is not about being a hippie or even being hip. It involves your life, and your livelihood.
There is a link to the crap we are forced to eat as Americans, and our health. Choose wisely!
Morgellons Research Foundation
The CDC's attempt to get you to believe they are doing something about this....
The disease process was brought to my attention by my vegetarian son, Renn, who is extremely into the non-GMO movement and who is more picky about what he eats and wears than anyone I know. Renn has long been into the travesty of Monsanto Corp, and what they've done to the American Food supply with their genetically modified organisms, and monopoly of the seed supply. If you haven't researched that, I'll give it to you in a nutshell: Monsanto is responsible for the bumper crops of corn and soybeans that we now grow in the US, mostly to feed our beef lot super meat growing sites, and our chicken productions.
To obtain a "superior" seed, Monsanto corporation has genetically modified the seed supply, by adding agrobacterium, a gram negative bacteria which they inject into the roots of plants. The result is a spore that causes massive overgrowth in the root, and a resulting bumper crop of produce. What's wrong with that, you ask? Well, for starters, there are no long-term studies that look at how consuming produce that is genetically modified affects our body, or at how eating meat that has been fed GMO's affects our body.
We've been eating this stuff for nigh on 30 years now, and about 12 years ago, some people started showing up in the emergency departments around the country, complaining about crawly, itchy skin, lesions sprouting strange fibers, chronic fatigue, neurological problems, and black flakes in their urine. No one knew what was going on with them, and although their numbers increased, the general consensus of the medical community was that they were suffering from a psychiatric disorder known as Psychotic Parasitosis. In other words: you think you have bugs and fibers moving around under your skin. Take an anti-psychotic, and deal with it.
Thanks to one woman, whose 2 year old baby kept sprouting "fuzz balls" out of his face, the Morgellons Research Foundation was begun in 2002, and in 2008, the CDC agreed to sponsor a study into the disease process of people suffering from Morgellons. Problem is, the research was completed in 2009, and as of yet, not a word has been said regarding the findings. NO ONE is studying this problem, even though a SUNY study in 2007 and another study in 2009 both showed that all fibers tested from various patients tested positive for agrobacterium DNA. The 2009 study showed conclusively that agrobacterium in the specific patient studied was coming out of his WATER SUPPLY. But no one has looked into where the water came from, or it's proximity to fields growing GMO produce. No one has studied why people are sprouting foreign substances out of their bodies that have agrobacterium DNA. What is that doing in humans?
My theory? That in immunosuppressed people, the body cannot deal with what is essentially a foreign substance, and therefore the body attempts to rid itself through unconventional means. IE: pushing fibers out through the skin, or through the urine.

The most concentrated reporting of Morgellons in the nation is in the hugely agricultural area of northern California. Texas and Florida are a close second. Look at all the other borderline states! Very interesting, and it should prove telling as more and more people register with the foundation, to see what happens to this map.
Here's a picture of some of those nasty fibers:

There is a link to the crap we are forced to eat as Americans, and our health. Choose wisely!
Morgellons Research Foundation
The CDC's attempt to get you to believe they are doing something about this....
Thursday, October 27, 2011
STOCK!
Many people buy their stock at the store, and I used to be one of them, I admit. It's not that expensive, it's easy to open and dump, and you can buy it when it's on sale. I lived like that for many years.
Fairly recently, I started to care where my food came from, how it was treated if it was an animal, and how it was grown if it was a plant. That's when I went back to my roots, and started making certain things from scratch, and stock is one of them. It's not hard, but I quit doing it years ago for the above mentioned reasons.
Let me start by saying that I only use organic, free range chicken. I know the family who raises them for me, I know what kind of treatment they get, what they're fed, and how many times a week their giant chicken house gets moved to clean grass. They eat bugs, grass, seeds, worms, and everything that chickens are supposed to eat. They taste AMAZING, and I think that $20 a chicken is completely worth it to feel good about serving them. They also cook completely different than chicken-mill raised birds. One of the things about chicken stock, is that after you get the bird in the pot, you bring it to a rapid boil, then turn it down to low, skim the foam (which is the marrow from the bones of the chicken) that comes to a greasy gray scum on the top of the water. If you don't skim it, or continue to boil the hell out of it, then your chicken's bone marrow will fuse with the water, and you will have a nasty, murky, gray-tinged looking broth. This trick is something I JUST LEARNED! So all you beginners, don't think that you cannot learn new things, even after you've been cooking for 30 years! This is the main reason why I always hated the broth I made! It tasted okay, but it looked gross. I was mortified to learn that all it took was patience! The first thing I noticed when using these organic birds, is that there is very little junk, and I usually only skim once. I think it's because they're natural, they're not loaded full of chemicals, dyes, antibiotics, and drugs, and therefore they are very, very clean.
 This is my chicken, right after I skimmed it and and added the veggies. Very clear and fragrant.
SO~~~
STEP ONE: Plan stock making for a day when you aren't rushed. Then buy a good chicken, preferably organic, free range. Your end product will be so superior, that you won't regret it. Besides, when I show you everything you can do with one stewed chicken, the results will have you sold.
STEP TWO: Invest in a good stock pan. I bought a 20 quart stock pan about 10 years ago, and it's saved my bacon on many occasions. I believe I bought it at Walgreen's or Bi-Mart. I know I didn't pay more than $12 for it. It's a necessity when making stock, and it also is awesome at Thanksgiving time when you need to make mashed potatoes by the 20# sack :>) Put your bird in the pot, and fill the pot up with COLD water until the bird is just submerged.
STEP THREE: Bring chicken to a rapid boil, then immediately reduce heat to a simmer. This means that the bubbles are just breaking the surface occasionally. This is SLOW. FYI: I put my bird in straight from the freezer, frozen solid (with that said, the farm where I buy my chickens leaves the necks attached, not wrapped in paper before they freeze them and stuff them in the cavity. They also don't put the organs in the cavity. See comments on that below.) In other words, if you're going to skip thawing it, then know what's in the cavity before you just throw it in the pan!
STEP FOUR: Skim off any foam that comes to the surface with a slotted spoon, and discard it. Then add 1 peeled carrot, one peeled onion sliced in half, 2 stalks of celery, 1T of peppercorns, 1/2 a head of garlic, one large handful of fresh parsley, several sprigs of thyme (no need to pick off leaves, just throw them in the pot), and 1 T kosher salt.

I cooked it low and slow for about 5 hours, keeping an eye on the water level, and tasting occasionally to see if it needs more salt.

When it's done, just set it on the counter for a while, maybe 15 minutes. It should still be hot, but not boiling, so you don't burn yourself when you strain it.
STEP FIVE: Pull the chicken out, and place in a bowl. It might come out in many, many pieces, and that's okay. Just pull out as much as you can with a big fork, and set aside. The rest you'll get when you strain it.
STEP SIX: Put a giant silver bowl in your sink. Get a metal strainer (I use one I bought at the Dollar Tree for $1, and it works GREAT.) Pour the broth through the strainer, until strainer is about half full. Raise the strainer up over the bowl, and allow all liquid to run into larger bowl. Put chicken and vegetables that remain in with the other bowl of chicken until you're ready to deal with that. Continue this process until all broth is strained through fine strainer.

This picture shows the vegetable broth, but you get the idea with the chicken.
STEP SEVEN: Let the broth cool a little more, and then ladle into freezer containers. I happen to love Ball Freezer Containers. They are reusable, you can write on them, they have a screw on top (very important) and they are so easy to pull out of the freezer and thaw in the microwave when you're ready to use. They're cheap, and you can get them at Bi-Mart or Wal-Mart in the canning/freezing section.
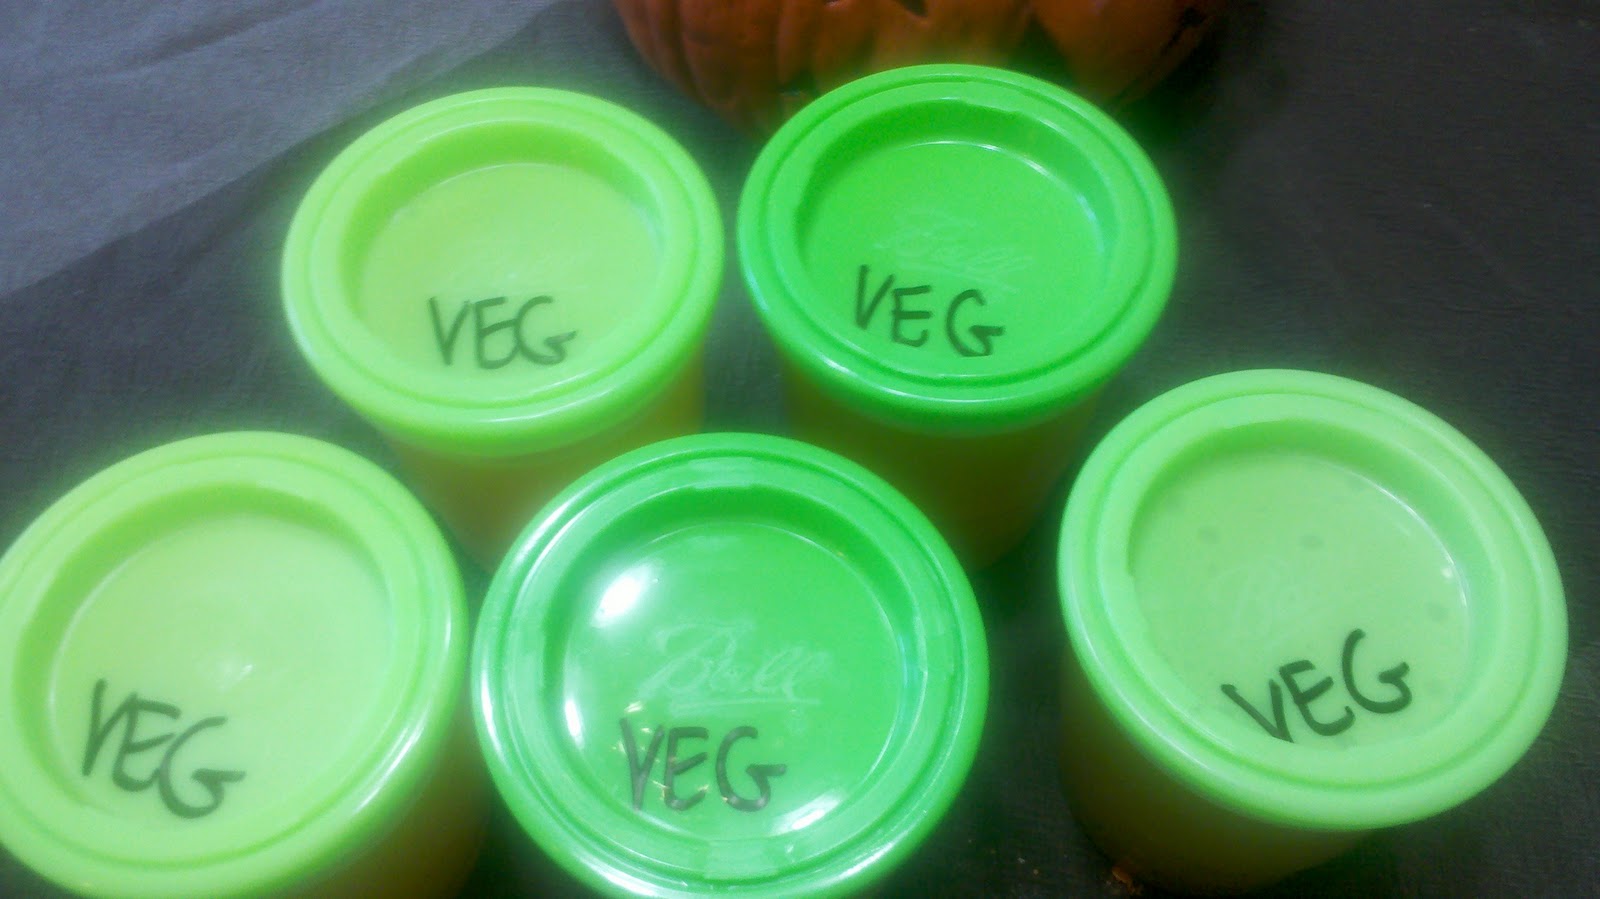
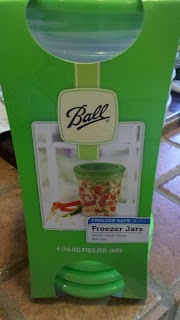 Let the stock cool on the counter completely, then put the lids on, mark them, and throw them in the freezer. These particular freezer jars are made to stack, which really works great in any of my three freezers.
STEP EIGHT: pick the chicken off the bones. If you've done it right, the meat will just slide right off, and this won't take you very long at all. Don't forget the neck, wings and drumsticks! Most organic chickens come with the necks intact, but yours might be inside the bird. I don't use the gizzards, (my farm doesn't include them at all, which is FINE with me!). I don't like the flavor they give to the stock. But the necks, wings and drumsticks are loaded with meat. Just pick the bones out and you won't regret the extra few minutes this takes for the big handful of meat you get.
If you're wanting to make beef stock, it's pretty much the same as above, only go to the butcher and ask for beef bones. You'll have a bit more skimming to do, depending on where you buy your beef, but the process is really similar. I usually add a little Kitchen Bouquet to my beef stock. You can get this anywhere that sells spices, and it really makes your stock a nice color.

 Here's what mine looked like before I threw them in the oven. Once they start to smell good, then put them in a large kettle, and add at least 2 gallons of water. Boil them with a bay leaf, some parsley, some oregano, Kosher salt, and a T of peppercorns. I like my vegetable stock to have a golden color, and my opinion is that if you use either a butternut or some other small savory squash, or a bunch of carrots, that you'll get that same golden finish. I wouldn't use both, because I think the flavors stay more pure if you use one or the other, but it's totally a matter of taste. One vegetable family that I don't use in my stock, is anything in the cabbage family, or the beet family. I find their flavors dominate the broth and ruin the dishes where I use vegetable broth. If you're really scared about what to put in vegetable broth, go to the store and read the ingredients on a commercially prepared broth, and use what they use. Also, be very careful about things like potatoes, yams and parsnips/turnips. They can turn your broth murky.
Here's what your broth should look like after simmering for about 3 hours:
 Follow the same process as above for straining, packaging and freezing. There are a couple of options for the cooked vegetables. One: you can compost them.

This is my compost bucket, and these went out onto the garden spot.
If you (like my vegetarian son, who came in and gave me a hard time about throwing all this goodness on the garden) want to be even more thrifty, then you can puree all these good vegetables up by running them through a Foley food mill. (This item is also something that I think is really necessary any kitchen, and is very inexpensive. I got mine at Bi-Mart.) The cool thing about the Foley food mill is that it removes all the skins, seeds, etc, and leaves you with a nice creamy product. You could then add some milk or broth, and have yourself a nice soup base to which you could add pretty much anything. I had other things to do today, so I sent my cooked veggies back to Mother Earth, where they will fertilize next years garden.
To recap: from one $20 chicken and a bunch of vegetables that I had sitting around on my counter, here's what I got:

One giant bowl of chicken, with which I made a dozen chicken enchiladas, with a 1/2 a gallon of leftover chicken enchilada filling for the next time I want to make them (see the bags of chicken at the bottom of the picture below.) I just labeled it, and tossed it in the freezer. I also got and additional half a quart of dark chicken meat for the next time I make chicken noodle soup, which I threw in the freezer too.
And the BROTH!!:
So Yummy!! and good for you. PLUS, you know whats in it and where it came from! With organic stock running anywhere from $4-$6 a quart depending on where you shop, you can see that you've already saved yourself money by doing it this way. Plus, you've got at least three meals out of your chicken, depending on your family size. All around, this is the smart way to cook and eat.
One last bit of advice, especially for my young married readers. If you only buy one cookbook this year, invest in "The Art of Simple Food" by Alice Waters. It's full of very easy, basic items, that will save you money for the rest of your life, if you learn to master these techniques when you're first starting out. I cannot say enough about nice things about Alice. When you get some time, Google her, and you'll be amazed by all the good things she does with her life. In this day and age of health problems and disease, what we eat is, in my opinion, the difference between life and death. It DOES make a difference where it comes from, and how it's prepared! Bon Appetit!

Fairly recently, I started to care where my food came from, how it was treated if it was an animal, and how it was grown if it was a plant. That's when I went back to my roots, and started making certain things from scratch, and stock is one of them. It's not hard, but I quit doing it years ago for the above mentioned reasons.
Let me start by saying that I only use organic, free range chicken. I know the family who raises them for me, I know what kind of treatment they get, what they're fed, and how many times a week their giant chicken house gets moved to clean grass. They eat bugs, grass, seeds, worms, and everything that chickens are supposed to eat. They taste AMAZING, and I think that $20 a chicken is completely worth it to feel good about serving them. They also cook completely different than chicken-mill raised birds. One of the things about chicken stock, is that after you get the bird in the pot, you bring it to a rapid boil, then turn it down to low, skim the foam (which is the marrow from the bones of the chicken) that comes to a greasy gray scum on the top of the water. If you don't skim it, or continue to boil the hell out of it, then your chicken's bone marrow will fuse with the water, and you will have a nasty, murky, gray-tinged looking broth. This trick is something I JUST LEARNED! So all you beginners, don't think that you cannot learn new things, even after you've been cooking for 30 years! This is the main reason why I always hated the broth I made! It tasted okay, but it looked gross. I was mortified to learn that all it took was patience! The first thing I noticed when using these organic birds, is that there is very little junk, and I usually only skim once. I think it's because they're natural, they're not loaded full of chemicals, dyes, antibiotics, and drugs, and therefore they are very, very clean.

SO~~~
STEP ONE: Plan stock making for a day when you aren't rushed. Then buy a good chicken, preferably organic, free range. Your end product will be so superior, that you won't regret it. Besides, when I show you everything you can do with one stewed chicken, the results will have you sold.
STEP TWO: Invest in a good stock pan. I bought a 20 quart stock pan about 10 years ago, and it's saved my bacon on many occasions. I believe I bought it at Walgreen's or Bi-Mart. I know I didn't pay more than $12 for it. It's a necessity when making stock, and it also is awesome at Thanksgiving time when you need to make mashed potatoes by the 20# sack :>) Put your bird in the pot, and fill the pot up with COLD water until the bird is just submerged.
STEP THREE: Bring chicken to a rapid boil, then immediately reduce heat to a simmer. This means that the bubbles are just breaking the surface occasionally. This is SLOW. FYI: I put my bird in straight from the freezer, frozen solid (with that said, the farm where I buy my chickens leaves the necks attached, not wrapped in paper before they freeze them and stuff them in the cavity. They also don't put the organs in the cavity. See comments on that below.) In other words, if you're going to skip thawing it, then know what's in the cavity before you just throw it in the pan!
STEP FOUR: Skim off any foam that comes to the surface with a slotted spoon, and discard it. Then add 1 peeled carrot, one peeled onion sliced in half, 2 stalks of celery, 1T of peppercorns, 1/2 a head of garlic, one large handful of fresh parsley, several sprigs of thyme (no need to pick off leaves, just throw them in the pot), and 1 T kosher salt.

I cooked it low and slow for about 5 hours, keeping an eye on the water level, and tasting occasionally to see if it needs more salt.

When it's done, just set it on the counter for a while, maybe 15 minutes. It should still be hot, but not boiling, so you don't burn yourself when you strain it.
STEP FIVE: Pull the chicken out, and place in a bowl. It might come out in many, many pieces, and that's okay. Just pull out as much as you can with a big fork, and set aside. The rest you'll get when you strain it.
STEP SIX: Put a giant silver bowl in your sink. Get a metal strainer (I use one I bought at the Dollar Tree for $1, and it works GREAT.) Pour the broth through the strainer, until strainer is about half full. Raise the strainer up over the bowl, and allow all liquid to run into larger bowl. Put chicken and vegetables that remain in with the other bowl of chicken until you're ready to deal with that. Continue this process until all broth is strained through fine strainer.

This picture shows the vegetable broth, but you get the idea with the chicken.
STEP SEVEN: Let the broth cool a little more, and then ladle into freezer containers. I happen to love Ball Freezer Containers. They are reusable, you can write on them, they have a screw on top (very important) and they are so easy to pull out of the freezer and thaw in the microwave when you're ready to use. They're cheap, and you can get them at Bi-Mart or Wal-Mart in the canning/freezing section.

STEP EIGHT: pick the chicken off the bones. If you've done it right, the meat will just slide right off, and this won't take you very long at all. Don't forget the neck, wings and drumsticks! Most organic chickens come with the necks intact, but yours might be inside the bird. I don't use the gizzards, (my farm doesn't include them at all, which is FINE with me!). I don't like the flavor they give to the stock. But the necks, wings and drumsticks are loaded with meat. Just pick the bones out and you won't regret the extra few minutes this takes for the big handful of meat you get.
BEEF STOCK
If you're wanting to make beef stock, it's pretty much the same as above, only go to the butcher and ask for beef bones. You'll have a bit more skimming to do, depending on where you buy your beef, but the process is really similar. I usually add a little Kitchen Bouquet to my beef stock. You can get this anywhere that sells spices, and it really makes your stock a nice color.

VEGETABLE STOCK
If you want vegetable stock, there are truly no rules! I love making vegetable stock, because it is a fabulous way to get rid of old vegetables that you forgot about. Start by thinking about how things would taste together. If you wouldn't roast them all and serve them as a side dish together, don't put them together for your stock. Here's what I had today when I made stock: an onion, a few shallots, a yellow crookneck squash, a zucchini, a butternut squash, garlic, celery and a few wrinkly tomatoes. Throw all these veggies on a roasting pan (or cookie sheet) and roast at 400 degrees until they start to brown slightly and smell fragrant. You don't want them "done" but they should be starting to brown.
Here's what your broth should look like after simmering for about 3 hours:


This is my compost bucket, and these went out onto the garden spot.
If you (like my vegetarian son, who came in and gave me a hard time about throwing all this goodness on the garden) want to be even more thrifty, then you can puree all these good vegetables up by running them through a Foley food mill. (This item is also something that I think is really necessary any kitchen, and is very inexpensive. I got mine at Bi-Mart.) The cool thing about the Foley food mill is that it removes all the skins, seeds, etc, and leaves you with a nice creamy product. You could then add some milk or broth, and have yourself a nice soup base to which you could add pretty much anything. I had other things to do today, so I sent my cooked veggies back to Mother Earth, where they will fertilize next years garden.
IN CONCLUSION
To recap: from one $20 chicken and a bunch of vegetables that I had sitting around on my counter, here's what I got:

One giant bowl of chicken, with which I made a dozen chicken enchiladas, with a 1/2 a gallon of leftover chicken enchilada filling for the next time I want to make them (see the bags of chicken at the bottom of the picture below.) I just labeled it, and tossed it in the freezer. I also got and additional half a quart of dark chicken meat for the next time I make chicken noodle soup, which I threw in the freezer too.
 | |
| Chicken Enchiladas, top and cheese enchiladas below |
And the BROTH!!:
 |
| There's my additional chicken, below the chicken broth! |
 |
| Veggie Broth! |
One last bit of advice, especially for my young married readers. If you only buy one cookbook this year, invest in "The Art of Simple Food" by Alice Waters. It's full of very easy, basic items, that will save you money for the rest of your life, if you learn to master these techniques when you're first starting out. I cannot say enough about nice things about Alice. When you get some time, Google her, and you'll be amazed by all the good things she does with her life. In this day and age of health problems and disease, what we eat is, in my opinion, the difference between life and death. It DOES make a difference where it comes from, and how it's prepared! Bon Appetit!

Wednesday, October 26, 2011
Ten Years Later
So, many of you know that I'm from a long line of Mormon Pioneers, and that I was born and raised in the Mormon Church. I've considered myself "out" of the church since 2000, when I officially told my bishop I was done. He proceeded to threaten, cajole and intimidate me, then tried for about six years to reactivate us by sending the latest brave soul to our door to tell us how lost we were. I politely told each and every person that we were fine, and to please just leave us alone.
A few years back, someone close to me that I knew resigned her membership in the church, and I've been wanting to do that since she did, but just never found the time to do it. Okay, maybe I was still deeply frightened of such a step, regardless of how much I profess to not believe in the church. But the idea continued to intrigue me, as I don't believe in or recognize the church leaders as having authority over me, and didn't want to endure the stigmatism of having a church court in order to leave the church.
I found this wonderfully supportive website: http://www.mormonnomore.com/, which gives support and instructions for how to resign your membership. Resigning sounds to me like it's a choice I made, rather than one made for me because I've sinned. Since I had no choice in the matter of being baptised when I was but eight years old, I did have a choice about how I was going to leave.
We (me and four of my five children) received our letters from the church last week letting us know that our resignations had been accepted, and that if we ever wanted to return, to contact our local church leaders. It was all very clean and very non-dramatic, just as the site promised, if the instructions were followed exactly. This process was dramatically different from other people I know who have left, who have been forced to go through a church court trial, and in the process have had their names slandered from the pulpit of the local ward house. It was truly a blessing to me to be able to finally cut the last connection. Leaving that last string attached, even though I haven't felt part of the church emotionally or physically for over 10 years, still bothered me, because I don't do anything half way, and this felt hypocritical to me to still be an official member. Almost like I was saying: "Well, I'm going to remain a member, in case it's all true, and I'm just temporarily messed up." That wasn't the way I felt, so completing this final step was what I needed to do.
A very dear friend, who is one of my few remaining LDS friends from my "previous life" directed me to the blog of a true warrior. A woman and her family who live in a very active LDS area of Utah, and who had the courage to leave the church and follow their own path in life. She has written a letter to her family explaining her reasons for leaving the church, as well as her feelings during the process. And it is a process, I assure you!! I'm linking to her blog here (which I hope is okay; she's a goddess in my eyes, as well as a fantastic writer), because this letter could have come straight out of my head.
As I was sharing with my friend, none of my family who are still LDS have ever asked me any questions about my beliefs now, or the reasons why I left, save one of my sisters in law. I am more than happy to share, if people ask, and I'd rather you know why, than make your own assumptions. Read this open letter to Mormons, and if you still want my personal take on it, ask me and I'll tell you.
Angela's open Letter to Mormons: Angela's Blog: Wholehearted
Signed: extremely happy to be MormonNoMore
AKA: your same old friend Dayna
Tuesday, October 25, 2011
Pintrest, kind of like internet website picture porn.....
I've discovered Pintrest this week. If you've never been to it, give it a try at: http://www.pintrest.com
You have to wait for an invite if you want your own bulletin board, which kind of bugs, but they don't stop you from poking around in the mean time...
It's a blast! Lots of pictures, which lead to tons of different links, one of which I found this awesome pretzel recipe from A Cozy Kitchen:


 .
.
You have to wait for an invite if you want your own bulletin board, which kind of bugs, but they don't stop you from poking around in the mean time...
It's a blast! Lots of pictures, which lead to tons of different links, one of which I found this awesome pretzel recipe from A Cozy Kitchen:
Soft Pretzel Tots
Soft Pretzel Tots
1 1/2 cups warm (110 to 115 degrees F) water
1 tablespoon sugar
1 1/2 teaspoons kosher salt
1 package active dry yeast
4 1/2 cups all-purpose flour
2 ounces unsalted butter, melted
Vegetable oil, for pan
10 cups water
2/3 cup baking soda
1 large egg yolk beaten with 1 tablespoon water
Pretzel salt or coarse Sea Salt
1 tablespoon sugar
1 1/2 teaspoons kosher salt
1 package active dry yeast
4 1/2 cups all-purpose flour
2 ounces unsalted butter, melted
Vegetable oil, for pan
10 cups water
2/3 cup baking soda
1 large egg yolk beaten with 1 tablespoon water
Pretzel salt or coarse Sea Salt
Combine the water, sugar and kosher salt in the bowl of a stand mixer and sprinkle the yeast on top. Allow to sit for 5 minutes or until the mixture begins to foam. Add the flour and butter and, using the dough hook attachment, mix on low speed until well combined. Change to medium speed and knead until the dough is smooth and pulls away from the side of the bowl, approximately 4 to 5 minutes. Remove the dough from the bowl, clean the bowl and then oil it well with vegetable oil. Return the dough to the bowl, cover with plastic wrap and sit in a warm place for approximately 50 to 55 minutes or until the dough has doubled in size.
Preheat the oven to 450 degrees F. Line 2 half-sheet pans with parchment paper and lightly brush with the vegetable oil. Set aside.
Bring the 10 cups of water and the baking soda to a rolling boil in an 8-quart saucepan or roasting pan.
In the meantime, turn the dough out onto a slightly oiled work surface and divide into 4 equal pieces. Roll out each piece of dough into a 22-inch rope. Cut the dough into 1-inch pieces; using your two hands, one-by-one, roll them into circles. Place the balls (or tots) onto the parchment-lined half sheet pan.
Place the pretzels tots into the boiling water, 1 by 1, for 30 seconds. Remove them from the water using a large flat spatula. Return to the half sheet pan, brush the top of each pretzel tot with the beaten egg yolk and water mixture and sprinkle with the pretzel salt (or coarse sea salt). Bake until dark golden brown in color, approximately 12 to 14 minutes. Transfer to a cooling rack for at least 5 minutes before serving.
Saturday, October 22, 2011
The winning Chili recipe!

Green Chicken Chili
SOAK:
1 1/2 C dry great Northern beans
ADD:
4 C chopped tomatillos
4C roasted, seeded, diced Anaheim chilies (about 8 chilies)
2 C each diced onion and roasted, seeded jalapenos (about 5 chilies)
3T minced garlic
1T ground cumin
2 tsp dried oregano
1 tsp ground coriander
4C chicken broth
STIR:
4C shredded rotisserie chicken
1/4 C masa harina
3T fresh lime juice
Salt and pepper to taste
GARNISH:
lime wedges, sour cream, and chopped fresh cilantro
SOAK beans according to package directions; drain, then add to a 5-6 quart slow cooker.
ROAST: chilies on high broil, turning until crispy blackened skins appear. Remove to plastic sack, and sweat on the counter until cool. Remove blistered skins, and seeds. Chop.
ADD: tomatillos, Anaheim chilies, onion, Jalapenos, garlic, cumin, oregano, coriander and broth to the slow cooker. Cook chili on high-heat setting until beans are tender, about 4 1/2-5 1/2 hours. I've found this really depends on how old your beans are, and how they've been stored.
STIR: chicken and masa harina into chili; cook 30 minutes more. Stir in lime juice. Season with salt and pepper.
GARNISH each serving with lime wedges, sour cream and cilantro.

Subscribe to:
Posts (Atom)